I am really getting good at this not trying to be perfect thing. That's probably because I know that I'll never be perfect at sewing. Or even good. But I don't care. I just want to make some simple things for family, friends and oh, well, myself actually.
Like these loop scarves. Now, any experienced seamstress would be rolling around the floor, laughing hysterically. As much as I can't cut a straight line, I can't sew one either. And no matter how many tutorials I read or watch, I still don't get that final closure on the loop right.
But I don't care. I'm so excited about this. It's a loop! It's made from absolutely gorgeous Lotta Jansdotter fabric! It's mustard yellow and navy blue. And I made this. Using a sewing machine.
This one is great, too. It's made with Cloud 9 organic fabric.
I actually made one more as a gift for a good friend who's birthday is soon, but I'm not going to spoil it and share that. I just hope she won't mind that it's far from perfect, but I'm pretty sure she'll appreciate it anyway. Because she's great like that. She has three boys, works full-time and is the most energetic person I know. And she deserves some pampering, too. So I made her a scarf.
Anyhow, can't wait to sew another one. I have some fabric left and maybe I'll eventually understand how to get that last seam closed nice and flat. Any hints?
Swenja
Tuesday, February 21, 2012
Monday, February 20, 2012
Decluttering my recipe binder
I promised to tackle two project from my home projects list per month. This month I was actually quite busy but haven't really gotten around to posting about any of the bigger things I tackled. So I'm posting about something small instead: finally decluttering my recipe collection.
Not sure if this one here is helping or supervising.
Probably supervising. What you see here is a fraction of my pile actually. I had a stuffed binder and lots and lots of loose printouts of recipes found online. All stuffed in a cabinet in the living room. So every time I was looking for something I either had to dig through the pile or just print another copy. Which explains why I had so many duplicates.
I took it all out and sorted by category. Revolutionary, I know.
And that was what I was left with. All the rest went into the recycling bin.
Now, I could have just been happy with this, post my pics and be done with it. And mind you, I sorted this two weeks ago. So what happened? Well, I didn't like the dividers.
Just let that sink in for a minute. I haven't crossed this off my list for two weeks now just because I didn't like the color of the dividers.
I think I read too many organizing blogs. Because really, I have a confession to make. I don't have white walls (gasp!), I don't scrapbook and I do not own a label maker. There you have it. Still I had this image in my head that I was supposed to add cute dividers and make it pretty, somehow.
I figured it would take minutes and some colorful paper. So today I finally managed to get around to it.
After two minutes I realized my plan wasn't working.
Remembering Rachel's post last week, I decided to do what I'm trying to do more often: just use what I have on hand and not try to make it perfect. I mean come on, it's a recipe binder. It's supposed to store recipes so I can find them and cook from them. And yeah, it helps if it's nice enough that I'll find a home for it in my kitchen and not stuff it in a living room cabinet.
But a couple colorful dividers with simple handwritten labels (stuck on by totally professional clear tape) and a cut out and stamped label as title (again stuck on using clear packing tape. Complete with creases. Oh well) is just about good enough.
So I went and reorganized some cookbooks and found this one here a new home on a kitchen shelf.
And that's it, crossed off my list and all done!
How far do you take your projects? When is good enough just good enough and when do you need perfect?
Cheers,
Swenja
Not sure if this one here is helping or supervising.
Probably supervising. What you see here is a fraction of my pile actually. I had a stuffed binder and lots and lots of loose printouts of recipes found online. All stuffed in a cabinet in the living room. So every time I was looking for something I either had to dig through the pile or just print another copy. Which explains why I had so many duplicates.
I took it all out and sorted by category. Revolutionary, I know.
And that was what I was left with. All the rest went into the recycling bin.
Now, I could have just been happy with this, post my pics and be done with it. And mind you, I sorted this two weeks ago. So what happened? Well, I didn't like the dividers.
Just let that sink in for a minute. I haven't crossed this off my list for two weeks now just because I didn't like the color of the dividers.
I think I read too many organizing blogs. Because really, I have a confession to make. I don't have white walls (gasp!), I don't scrapbook and I do not own a label maker. There you have it. Still I had this image in my head that I was supposed to add cute dividers and make it pretty, somehow.
I figured it would take minutes and some colorful paper. So today I finally managed to get around to it.
After two minutes I realized my plan wasn't working.
Remembering Rachel's post last week, I decided to do what I'm trying to do more often: just use what I have on hand and not try to make it perfect. I mean come on, it's a recipe binder. It's supposed to store recipes so I can find them and cook from them. And yeah, it helps if it's nice enough that I'll find a home for it in my kitchen and not stuff it in a living room cabinet.
But a couple colorful dividers with simple handwritten labels (stuck on by totally professional clear tape) and a cut out and stamped label as title (again stuck on using clear packing tape. Complete with creases. Oh well) is just about good enough.
So I went and reorganized some cookbooks and found this one here a new home on a kitchen shelf.
And that's it, crossed off my list and all done!
How far do you take your projects? When is good enough just good enough and when do you need perfect?
Cheers,
Swenja
Sunday, February 19, 2012
{the simple things} Chocoholic
I promised I'd find something to post about for this week's simple things sunday besides cats and nature. So here we go. OK, I did post about little brother's love for chocolate before, but it's just so sweet. He loves anything chocolate. There are a million things he won't eat, but you can get him anytime with a piece of chocolate.
You see, my boys are like perfect little copies of their dad. They each have their own personality, to be sure, but they are very much like their dad in a lot of things. Most things, actually. With the only exception that little brother doesn't eat cheese and loves chocolate. Just like mommy.
So I don't really mind if he has a couple pieces of chocolate as an afternoon snack. My kids don't eat a lot of processed food, they know only homemade yogurt with real fruit and have never in their lives set foot in a fast food restaurant. So what if little brother loves chocolate?
Eventually he did need some milk to wash it all down though.
I will be linking up with Rebecca's simple things sunday again.
Happy Sunday!
Swenja
Last month his grandma came over and brought some chocolate bunnies. Yep, she bought chocolate bunnies in January. Go figure. I was going to save them for Easter, but my little chocoholic caught a glimpse of them and just had to have them. Sigh.
I love how the chubby little fingers carefully unwrap the gold foil from each bunny.
You see, my boys are like perfect little copies of their dad. They each have their own personality, to be sure, but they are very much like their dad in a lot of things. Most things, actually. With the only exception that little brother doesn't eat cheese and loves chocolate. Just like mommy.
So I don't really mind if he has a couple pieces of chocolate as an afternoon snack. My kids don't eat a lot of processed food, they know only homemade yogurt with real fruit and have never in their lives set foot in a fast food restaurant. So what if little brother loves chocolate?
Eventually he did need some milk to wash it all down though.
I will be linking up with Rebecca's simple things sunday again.
Happy Sunday!
Swenja
Saturday, February 18, 2012
{kid craft} Ocean in a bottle
Remember when I started this weekly kid craft thing in January and proposed to make ideas from the book that I got? Yeah. Well. Somehow I always get sidetracked by the things I see on other blogs or Pinterest. Like this week. Recovering from a really busy week and with carnival and everything going on, I needed something quick and simple. Then I found this.
All you need to make your little ocean is an empty bottle (or two), some water, food coloring (actually had to get some more blue because of these), simple oil such as sunflower, and something to live in your newly created little waterworld. Fish are nice but I couldn’t find any tiny plastic fish and finally decided to give up and use what I have instead. I’ve been trying to do that a lot lately. In this case, I had tiny sea shells. Don’t ask me where they came from, I think I bought them on vacation, but I’m not even sure. Anyhow. I also added a little glitter, because that never hurts and also I love using glitter without it getting messy.
So, fill your bottle about halfway with water and have your kids add some drops of blue food coloring. Close and shake to make sure you got the perfect blue.
Then add glitter and your ocean inhabitants.
Finally, add oil. I tried to glue the caps on but it wouldn’t work so I simply let the kids play with these where I could keep an eye on them. They made waves….
And just had fun with it. Not sure what I’m going to do with these or how long they keep, so this is probably not such a green project. Especially since I don’t usually buy plastic bottles. Oh well. Sometimes I just can’t worry about everything.
Happy crafting!
Swenja
Friday, February 17, 2012
Homemade vanilla sugar & an answer to my quick question
First of all thanks for the comments on my kitchen dilemma! As you said, the canisters should really go next to my stand mixer and be used for baking supplies. And that’s where they stayed ever since I took a photo of them for the post. I actually moved my blender somewhere else to have more room. And my tea now lives in simple, black and white Ikea tins. I smile every time I look at them.
So one of those gorgeous jars is for flour, one for sugar and the third? Well, that’s where the homemade vanilla sugar comes into play. You see, on this side of the pond we don’t usually use vanilla extract for baking. We use vanilla sugar, sold in little packs much like baking powder. Back in the days when recipes called for margerine instead of butter, this used to be the chemical, disgustingly artificial vanillin sugar.
These days even the smallest grocery store carries the real, organic vanilla sugar that actually contains pieces of ground-up vanilla. Not that the big companies aren’t still trying to tell you that you should use that artificial crap.
But before I start a full-scale rant on why I hate artificial vanilla aroma (did you know it’s in baby formula to start an early addiction?! Someone please stop me here…), let’s focus on the good news. Because it’s extremely easy to make.
All you need is a vanilla pod and some sugar.
You can even use a vanilla bean (is it a bean? Or a pod?) that’s left over from a recipe where you used up all the seeds. Or one that you have cooked in milk for vanilla pudding. There still is enough flavor for your sugar left. But since I had quite a few left that I didn’t end up using in my Christmas baking, I took a whole one, split it and scraped out the seeds and added those to the sugar as well, rubbing them in with my fingers.
Yum. I love the smell of vanilla.
And in case you’re confused: we use a tablespoon or so in baking just like you use your vanilla extract, except that we add this to the dry ingredients, usually with the rest of the sugar. When baking American recipes, I usually just add it with whatever sugar the recipe calls for and decrease that amount by a tablespoon.
It also works nicely sprinkled on rice pudding. Or pancakes. Or a simple fruit salad. Once it’s empty, just refill the sugar, the vanilla can be reused a few times.
Enjoy!
Swenja
Thursday, February 16, 2012
Sibling gifts: DIY dog accessories
This little cutie here is called Lenny. He's the special guest for little brother's doggie birthday party. He also little brother's favorite stuffed animal. The little guy is from Ikea and has the perfect size to be carried under the arm or used as a pillow.Big brother got his dog when he was quite little. His grandma also got him almost the complete line of accessories that Ikea sells for these dog. Felt or fabric rain coats, brushes, a basket, sweaters, collars - you name it, he has it. Recently little brother also got a dog of his own, but he didn't have anything for it yet.
So big brother and I went to Ikea and got one of those fabric baskets. Remember the fleece blanket we turned into quick Halloween capes? Well, while at Ikea we also got a red one.
Last week when I was off work and little brother spent the day at his grandma's we set to work, making accessories out of that blanket and some felt scraps.
First up was a cape. We used the Ikea dog accessories as templates and drew an outline onto the fleece, taking advantage of the blanket's pretty border. Big brother cut it out and we attached some self adhesive velcro for closure. We used cookie cutters to trace shapes onto felt scraps and big brother cut those out, too. I then glued them on with fabric glue. I guess I could have sewn them on, but my sewing machine and I are just getting to know each other and I didn't want to rush it.
Here's our dog modeling the cape. Oh hey, anyone out there who can explain to me why my camera gets all colors wrong every time I try to photograph something bright red? I tried to adjust the white balance but that doesn't seem to solve the problem. Maybe it's just my camera (it's a Pentax).
We also made a yellow collar with a blue heart.
And a blue scarf with a yellow star. I ended up doing some of the cutting out because big brother got "so tired". But at least all the ideas and color choices were his.
I think little brother is going to be thrilled. And big brother was quite proud of his work. And the dog has the perfect outfit for the party!
Woof! (big thanks to Greta at this point :))
Swenja
Wednesday, February 15, 2012
Preparing little brother's doggie party
You won't be surprised if I told you that I've been preparing little brother's birthday (we're talking March here) since January, right? Yeah, didn't think so.
For the longest time I was sure we were going to have a party involving some of his favorite things on earth: cars and keys. But looking through all my ideas I realized that with a birthday party for a three-year-old you can choose cute themes and they'll likely be excited about it.
There will be plenty of birthdays left for themes such as cars (not the Disney kind, mind you), dinosaurs, dragons, monsters and such.
But how much longer will they be carrying their stuffed dogs wherever they go? And since by coincidence my kids' two best friends, who are about the same age and go to preschool with them, also love their stuffed dogs, it hit me: of course! We're having a doggie party!
A party for three identical golden retrievers and one dalmatian to be precise, all from a certain Swedish store.
So the four boys plus their dogs will be the only guests we're inviting. I mean come on, he's turning 3! I don't need a mile-long guest list, and unfortunately they don't have any cousins.
Writing this post I realized I actually have no idea what sound dogs are supposed to make in the English speaking part of the world. Here they say "Wuff" or "Wau". Do help me on this one, please. Is is "Arf"? This part of foreign languages always cracks me up.
Anyhow. Back to the party. If you remember anything about big brother's fish party, you'll likely recall that I found a cute themed stamp and used that on pretty much everything, from invites to water bottles, fishing game and goodie bags (except for the cake). I can't draw, I'm no graphic designer and I either don't like the store bought party kits or they don't come in the theme I want (and if they do they're usually expensive). So I think of a theme, find a matching stamp and use that to tie it all together.
This time it took me forever to find a dog stamp that was cute but still looked like a real dog and not a cartoon character. But when I finally found it, it was perfect. I think it even looks a little bit like a golden retriever. And there was a dalmatian to go with it. Oh, and did I mention both stamps are mounted on olive wood that smells divine? What more can you ask for? They're both from Etsy seller ahueofduckeggblue. You know, just in case you're in need of stamps (she also does the most gorgeous pine trees. And apples. Pears. I'll stop here!)
I stamped simple white long sleeve tees (above) for the boys to wear to the party (and beyond, hopefully), using my new fabric ink pad. I love it so much I have to keep myself from stamping everything around me (I mentioned those apple and pear stamps, didn't I?).
Then I made simple invites, using the dog stamps plus my DIY bunting stamp. I didn't even bother printing the details on the cards and wrote them by hand instead. Not because I'm lazy but because everything takes way longer once I turn on my laptop... And because I'm trying to let go of my perfectionism. Sometimes good is good enough.
I also made some bookmarks and bone shaped tags and laminated them. In case you're wondering, those are the names of the dog guests. And yes, we have two dogs by the same name (those would be my boys who both named their dog after their grandma's dog). The tags are color coded the same way we usually use those melamine dishes by rice (do you know them? I know I should be getting rid of plastic, but they are so great) when all the boys play at our house. Each of them gets their favorite color, except for big brother, who has recently decided that he loves turquoise (my husband argues real men don't even know a color by that name exists). Don't have that color, so he's happy with white. Anyway.
The finished bookmarks. At our house, we never seem to have enough of them! Little brother made some as a sibling gift last Christmas and so we're recycling the idea here.
More laminated tags. These ones are going to be for the little party guests, who will be attending obedience school and getting their own tags.
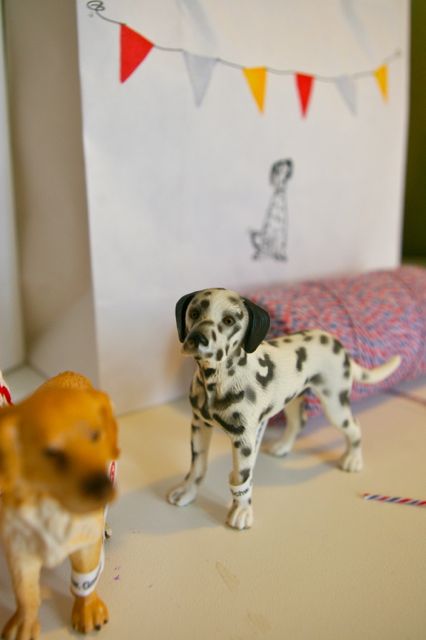
And here's the loot for the goodie bags. The day I had the party idea, I found these little plastic dogs. They're made by German company Schleich and one of our all time favorite toys. Their animals look very realistic and are extremely durable and high quality, with a softer touch to them than the usual plastic toys. They're usually fairly expensive so I was thrilled to get them on sale and therefore as party favors. Of course I got three golden retrievers and one dalmatian.
These activity and coloring books were also on sale. Don't you just love it when things fall into place like that?
Any other suggestions?
I'm off searching for my sugar cookie recipe. And finding out if rice makes turquoise plates and cups.
Swenja
For the longest time I was sure we were going to have a party involving some of his favorite things on earth: cars and keys. But looking through all my ideas I realized that with a birthday party for a three-year-old you can choose cute themes and they'll likely be excited about it.
There will be plenty of birthdays left for themes such as cars (not the Disney kind, mind you), dinosaurs, dragons, monsters and such.
But how much longer will they be carrying their stuffed dogs wherever they go? And since by coincidence my kids' two best friends, who are about the same age and go to preschool with them, also love their stuffed dogs, it hit me: of course! We're having a doggie party!
A party for three identical golden retrievers and one dalmatian to be precise, all from a certain Swedish store.
So the four boys plus their dogs will be the only guests we're inviting. I mean come on, he's turning 3! I don't need a mile-long guest list, and unfortunately they don't have any cousins.
Writing this post I realized I actually have no idea what sound dogs are supposed to make in the English speaking part of the world. Here they say "Wuff" or "Wau". Do help me on this one, please. Is is "Arf"? This part of foreign languages always cracks me up.
Anyhow. Back to the party. If you remember anything about big brother's fish party, you'll likely recall that I found a cute themed stamp and used that on pretty much everything, from invites to water bottles, fishing game and goodie bags (except for the cake). I can't draw, I'm no graphic designer and I either don't like the store bought party kits or they don't come in the theme I want (and if they do they're usually expensive). So I think of a theme, find a matching stamp and use that to tie it all together.
This time it took me forever to find a dog stamp that was cute but still looked like a real dog and not a cartoon character. But when I finally found it, it was perfect. I think it even looks a little bit like a golden retriever. And there was a dalmatian to go with it. Oh, and did I mention both stamps are mounted on olive wood that smells divine? What more can you ask for? They're both from Etsy seller ahueofduckeggblue. You know, just in case you're in need of stamps (she also does the most gorgeous pine trees. And apples. Pears. I'll stop here!)
I stamped simple white long sleeve tees (above) for the boys to wear to the party (and beyond, hopefully), using my new fabric ink pad. I love it so much I have to keep myself from stamping everything around me (I mentioned those apple and pear stamps, didn't I?).
Then I made simple invites, using the dog stamps plus my DIY bunting stamp. I didn't even bother printing the details on the cards and wrote them by hand instead. Not because I'm lazy but because everything takes way longer once I turn on my laptop... And because I'm trying to let go of my perfectionism. Sometimes good is good enough.
I also made some bookmarks and bone shaped tags and laminated them. In case you're wondering, those are the names of the dog guests. And yes, we have two dogs by the same name (those would be my boys who both named their dog after their grandma's dog). The tags are color coded the same way we usually use those melamine dishes by rice (do you know them? I know I should be getting rid of plastic, but they are so great) when all the boys play at our house. Each of them gets their favorite color, except for big brother, who has recently decided that he loves turquoise (my husband argues real men don't even know a color by that name exists). Don't have that color, so he's happy with white. Anyway.
The finished bookmarks. At our house, we never seem to have enough of them! Little brother made some as a sibling gift last Christmas and so we're recycling the idea here.
More laminated tags. These ones are going to be for the little party guests, who will be attending obedience school and getting their own tags.
And here's the loot for the goodie bags. The day I had the party idea, I found these little plastic dogs. They're made by German company Schleich and one of our all time favorite toys. Their animals look very realistic and are extremely durable and high quality, with a softer touch to them than the usual plastic toys. They're usually fairly expensive so I was thrilled to get them on sale and therefore as party favors. Of course I got three golden retrievers and one dalmatian.
These activity and coloring books were also on sale. Don't you just love it when things fall into place like that?
Then I made some simple felt dog biscuits and stuck them in tiny brown paper bags. The dogs need some treats, too, after all.
Still on my to-do list:
- the bunting. I plan on re-using the one from big brothers party but add some bright yellow. That's little brother's favorite color.
- finish making felt dog ears. I made a prototype to get little brother's approval because he is very particular about the way dog's ears have to be a tiny bit pointy and shouldn't just hang down. Sigh. Where did the kid get that from?
- decide if I want to buy a piñata. I've seen a really cute one, but these things are no tradition here and I don't think the boys will want to hit a dog with a stick. Not sure this sends an appropriate message... So I might just get it as centerpiece. Or not. Anyone out there who has made a piñata? I've seen tutorials but I'm not sure it's worth the effort. Not like we need any excuse for more candy around here!
- make the cake. I came across these great ideas for making chocolate cake, adding chocolate frosting and then chocolate cereal to make it look like dog food. I might make a cupcake version of that. I bought some small plastic pet dishes and I'm sure the boys would have a blast if I let them eat their cake out of those without any forks involved. It's going to get messy anyway.
- finish the collars. I'm making felt collars for the stuffed dogs that the kids can decorate a bit as a party activity.
- make a plan and treats for the obedience school. Simple stuff like sit, fetch and the like, and I'm thinking the ever popular gummy bears attached to card stock bones.
- balloons!
- bake doggie biscuits but with sugar cookie dough
- show you the gifts that big brother has made for the big day
Any other suggestions?
I'm off searching for my sugar cookie recipe. And finding out if rice makes turquoise plates and cups.
Swenja
Tuesday, February 14, 2012
Making the best of the icy cold
It's been really, really cold here. Beautiful, but cold. Around noon it usually gets warmer and my cat ventures out. One day he sat on the porch, staring at me. He kept looking at the watering can and then back at me. He loves drinking water outside, but of course everything was frozen. So I filled a plastic cup with water and put it out on the porch. The cat drank and happily came back in again.
Then I forgot about it.
It was frozen solid the next day. When we took it in, we discovered a fuzzy looking shape in it. So we set out another one to see if that would end up looking the same. It did.
Sunday morning the kids took both ice cups in and started examining them and playing with them. After watching for a few minutes I finally remembered this great idea that Andrea of Four Flights of Fancy had posted recently: Colored Ice Sculptures. Of course! Off to the kitchen I went and grabbed some food coloring and my camera. Here's the result in a fraction of the gazillion pictures I took.
Big brother carefully poking at it. Poking seems to be an integral part of every science experiment here.
If you look closely you can see some of that fuzzy structure in the center.
Let's bring on the colors!
Little brother's first choice was, of course, yellow. Then he added some green, too. Yellow is not the perfect color for this project.
The red worked best, actually.
This does look somewhat gross, doesn't it? Maybe I should bookmark this as a Halloween activity...
So thanks for sharing, Andrea! This has been really fun and the kids loved it.
Cheers,
Swenja
Then I forgot about it.
It was frozen solid the next day. When we took it in, we discovered a fuzzy looking shape in it. So we set out another one to see if that would end up looking the same. It did.
Sunday morning the kids took both ice cups in and started examining them and playing with them. After watching for a few minutes I finally remembered this great idea that Andrea of Four Flights of Fancy had posted recently: Colored Ice Sculptures. Of course! Off to the kitchen I went and grabbed some food coloring and my camera. Here's the result in a fraction of the gazillion pictures I took.
Big brother carefully poking at it. Poking seems to be an integral part of every science experiment here.
If you look closely you can see some of that fuzzy structure in the center.
Let's bring on the colors!
Little brother's first choice was, of course, yellow. Then he added some green, too. Yellow is not the perfect color for this project.
The red worked best, actually.
This does look somewhat gross, doesn't it? Maybe I should bookmark this as a Halloween activity...
So thanks for sharing, Andrea! This has been really fun and the kids loved it.
Cheers,
Swenja
Subscribe to:
Posts (Atom)