Saturday, February 11, 2012

{kid craft} Food chain animals

What a busy week! I had off from work so I tackled as many bigger projects on my list as I could. By Friday, I was exhausted. I figured I'll go pick up the kids early and have a quiet afternoon.

When I arrived at the preschool, big brother was discussing plans for a shadow play with his teacher. Apparently not thinking clearly, I mentioned this idea I had seen for making big fish that eat little fish (right here on the Babyccino blog).

From then on all the way home, while eating lunch, cleaning up and trying to start the bread for dinner, big brother kept saying the same thing over and over and over again: "Mommy, can we make those fish, please? Now? Mommy, please?".

Sure. Just let mommy grab a cup of coffee.

These are really simple actually. As simple as crafting with two little kids is, especially if one of them is getting off naps, there's dough rising in the kitchen and you're trying to take pictures at the same time.

We started with fish, but we also did a cat and mouse and a chicken with a worm. Basically this works with every animal eating another one, hence the food chain. So here's what you'll need:

  • thicker paper or card stock (we used colored but if you do these for shadow play only you can use things from your recycling bin like cereal boxes)
  • wooden clothes pins
  • toothpicks or wooden skewers 
  • scissors
  • glue
  • crayons or pencils
  • optional embellishments like wiggly eyes, feathers and the like

Start by drawing animals, marking a line from their mouth (don't forget the teeth!) all the way through. This is where you will cut them later. The animals should be looking sideways.


Big brother makes a piranha.

Cut them out, but don't cut along that line just yet.


Color if you feel like it.

Add some eyes. This is little brother's favorite part.


Now cut along the line and glue each half to one part of the clothespin. We ended up with some animals where we glued only the back part (too many teeth in this case) and some we glued on all the way. Didn't really make much of a difference in the end.


Now you have your big fish.


Piranhas. Look at those teeth!


Draw the little animal or bottom of the food chain.


Again, cut out and embellish.


Glue a toothpick to the back.


Secure with some more paper (remember, I have boys).


Here's your little fish. Watch out...


 ... there's a big fish coming!


It also works nicely as a shadow play. The original reason for doing these. Luckily we had the sun shining through the dining room windows so we could try it out.


Another big fish.

And a chicken!


We could have made quite a few more actually, but it was time to make that bread and start dinner. Next time. We might even get all fancy and add moving arms and such. So, what creatures are you going to make?

Have a good weekend,
Swenja


Tuesday, February 7, 2012

Oh the things I'd love to do


I don't know about you, but I come across great projects every day. The appear in my blog reader. In my inbox. And they simply pop up in my head.

I'd love to go right through Tsh's book One Bite at a Time. And make a blog project out of it like Jeanette does.

Or take my cookbooks. I have so many, and I would love to challenge myself to work my way through them. Like a recipe from one of them per week. Or work through about a quarter of the recipes of the time.

Then Greta posted about this fabulous daily photo challenge. Looks like so much fun! Did you see it? It has a topics or word per day, new every month. Would love to do it.

Sewing - I have no idea what I'm doing here, but I come across great ideas and gorgeous fabric every day.

And don't even get me started on crafts and other projects.

Ahhhh, so many good ideas.

But then there is plain old life happening.

Dishes to be done. Lion costumes to be made (we have carnival here next week). Bills to be paid. Milk to be bought. Exercise to be done (that is my least favorite part right there, but it's part of my goals. Ugh).

Oh, and there's work.

And, most importantly, there's family. It's the one thing that makes it all worth it.

And it's what I want to focus on.

Because that is my true goal this year.

So I'm keeping my weekly craft session, I'll keep posting simple things on Sundays, and I'll keep aiming to do cross two home projects off my list. I keep a stash of fabric upstairs and maybe I'll manage to sew something. And I'll be pulling some of my cookbooks from the shelves and try out new recipes more. I'm still saving cool ideas to my Evernote file.

But I'm trying hard not to add any pressure and just do these things whenever there's time. And if there isn't, then that is fine, too.

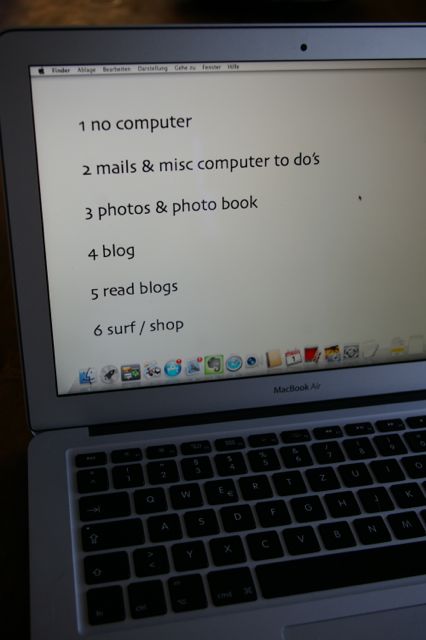
Meanwhile, I need to focus on what I really need and want to do. And not waste time surfing around the Internet, bookmarking more ideas before I even finish one previous one. So I made myself a little reminder.

Is that just me?

Cheers,
Swenja

{kid craft} Birthday cards

With all those birthdays recently, we had to do birthday cards. We simply used the watercolors while we were doing the watercolor bunting. The resulting pictures were left to dry for a few days and then we framed them.


Big brother painting a birthday cake. Because, of course, that's what you need for birthdays.


Switching colors.

And in case you didn't notice, it's a chocolate cake with cherry topping and candles. Blue candles.


Little brother has to try one, too!


And it actually looks like a cake with candles. Sort of.


Big brother made another one since he needed two cards. Love the candle dropping off the cake!


Once it was all dry, we matted the paintings and wrote the card. At least the important parts of it: to daddy.

And the other one for his uncle.


All done and quite proud of himself.


Little brother wasn't really interested in this part at all. So we just framed his in his color of choice: yellow!

I'll be trying to do my regular kid craft this week, too. But it's a busy week with lots of kid clothes purging, sewing lion costumes for carnival, working on big brother's present for little brother's birthday in March and many, many other things. So we're sharing this for now - hoping to be back again this week!

Cheers,
Swenja

Sunday, February 5, 2012

{the simple things} Chocolate cake

It's really cold over here. Perfect baking weather. And we're not talking anything light, airy or fruity here. Nope, we have a chocolate cake baking weather. Flourless chocolate cake, to be precise.

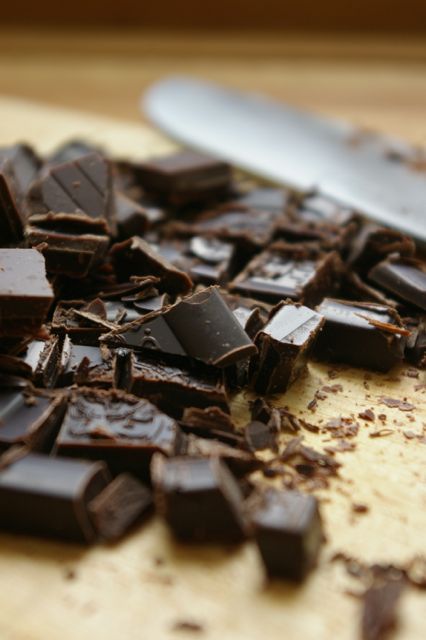
Chopping the chocolate might be the hardest part of the recipe.


Lots of cocoa powder!

Yum.

Getting over everything, including the recipe.


I made two smaller cakes, one to give to a friend who's currently trying to ban flour from her diet.


Once the cakes were out of the oven, I picked little brother up from preschool. It's carnival here soon, and the frequently paint the kids' faces in preschool. Today he was a cat. A yellow cat, mind you.


Apparently that yellow cat had quite a sweet tooth. Picking on my cake while mommy was not looking / busy taking pictures.


"Stop eating that, we want to save some for grandpa this afternoon!" - "But mommy, there is plenty left, I can have some!". Can't argue with toddler logic.


There's a whole in my cake!

Can't blame him though, the cake is delicious. Very dense and moist and chocolatey but not sweet. Sort of like a brownie, but much prettier. Vanilla whipped cream would be nice with it.

If anyone wants to give it a try, I used the recipe from the Gourmet cookbook, which is precisely a doubled version of this one here found at Epicurious that I had originally printed out before reading about the Gourmet version in the recipe comments.

I'll be linking up with Rebecca's simple things sunday again.


Off to grab another piece!
Swenja

Saturday, February 4, 2012

Quick question

I need your help here. You see, the other day, while having my brain turned off to auto-pilot and therefore mindlessly surfing the net and catching up with blog reading, I came across this post from TheKitchn, featuring ceramic storage containers.

I don't usually read the marketplace posts since most stores are US only anyway, but here I couldn't resist the image. Clicking through I found out these beauties here were from Sagaform. Quick research revealed there are also available in Germany.

Normally I would have added them to my wish list.

But in this case I just ordered them (told ya my brain was on auto-pilot).

Now, problem is, where do I put them? Originally I thought I'd put my tea in them and keep them next to the stove, where I usually keep my teapot.


But then they would also be perfect for flour. And sugar. And homemade vanilla sugar.

And they would look really, really nice next to my beloved stand mixer.


See what I mean?


Now, I could ask my husband. But we all know he'll just look at me like I'm crazy and that there are probably more important things I should be thinking about (he might just be right).

So I'm asking you guys. Next to the stove in plain sight whenever I walk into my kitchen or next to the mixer for keeping easy access to baking staples because I do bake a lot?

Of course I could just get another one. Although this time it will really have to be waiting on my wish list.

Hmmm....

Happy weekend,
Swenja

Friday, February 3, 2012

Quick (& green) gift: print your kids' art on water bottles


I remember being little and wanting to give birthday presents, too, but felt like most pictures or crafts I could make would eventually end up in some drawer. I want my kids to be able to make and give something useful.

So we made Daddy and uncle Timm some water bottles. Each of them made one so that Daddy could ditch those pesky plastic bottles and always take an aluminum one with him. My first attempt at designing an easy pattern for them failed miserably. But that same afternoon, big brother was doodling with a black marker. I saved it an scanned it and voila, we had our first design.


It's supposed to be a dog with a fishing rod, catching something really big. But I'm sure you saw that right away.


A week later, I also had them stamp a white piece of paper with simple black stars, a rocket and a planet stamp.


Here big brother was showing little brother how to draw a face, and a cat. Of course. There's a cat on nearly everything we do.

Speaking of cats, meet Lilly. She hates people but gets really cuddly and friendly every day at 9:30 am. Provided nobody else is around, of course. If you come to my house, you won't see her (she hides under the bed as soon as the doorbell rings). If you do see her you know that you're been here an awful lot and are practically family.


And no, my cats are not usually allowed to walk on the counters. But she was cuddly and I was ignoring her, taking pictures of these strange white things, so she decided to take matters in her own hands paws.

As for the bottles, I simply scanned the images the kids made, then uploaded them and had them printed on the bottles. I researched for a while to find a site that would allow me to print on an aluminum instead of plastic bottle and also a white one. The white background disappears and you can only see the black drawing on the bottle. It's turned out really well. I've done this before with white coffee mugs (one of big brothers first real drawings, a fish) and, when editing the image, a black mousepad with a white drawing.

I don't really like the stamped one half as much as the one with the impromptu drawing. Which goes to say that I should just let the kids have their way with these things instead of trying to art direct!

Cheers,
Swenja

Wednesday, February 1, 2012

{kid craft} Pompom critters - and a word about making pompoms

Big brother actually asks to do crafts now. You know, even if I never get anything blog worthy out of our weekly sessions again, it's been worth it already.

And I was pretty close to not getting anything blog worthy out of it this week.

You see, we were going to use homemade pompoms for this.

Turns out my memory of making pompoms as a kid was a little bit, uhm, foggy. I looked up tutorials before, mind you, and learned all about the perfect ratio of the inner and outer circle when making templates.

But I had completely forgotten how much time these things take. What was I thinking?

Exactly how was my not-even-three year old supposed to get the yarn pulled through and tight and repeat that a zillion times?

Oh.


I hadn't thought about that before. In my mind this was perfect and we were all making pompoms, the kids could decorate theirs while I made some more to use for their lion costume I'm supposed to make for Carnival next this month (really, it's February already?).

Anyhow.

Let's get back to reality and start with the critters we did end up making, shall we?

We used ready-made and very brightly colored pompoms, smaller pompoms, different colors felt (scraps are perfect here and I had plenty from making my felt flower brooches), bright pipe cleaners and of course, since my kids love them, goggly eyes.


Big brother got really serious and wanted to do a lion. Here he's cutting the ears, all by himself.


I helped a tiny bit with the wool mane, but he did everything else all by himself. I'm really proud of him.


Little brother didn't want a lion. "I want a dog, mommy! A yellow dog!" He helped me glue things on and pick out colors. Although I took some creative liberty here, because if it were for him, we'd had yellow dog with yellow nose, all-yellow ears and a yellow tongue. Ahhh, the wonders of toddler obsessions... He had also very precise ideas about how the ears should be. Originally I glued them down. He protested: "Mommy, I don't want flappy ears, I want real pointy ears like Lenny has!" That's my in-laws dog, and he loves her. So we redid the ears until he was pleased. We also added a tail, but skipped the feet.


Then big brother also made a monster. I love doing monsters because there is no right or wrong way with them and nobody can tell you to use a different nose (or glue on pointy ears).


Oh, and for those of you who are craftier / have older kids / remember doing them, here's our take on making pompoms, which could also be titled "An Exercise in Patience".

So, get some cardboard and draw to circles with a ratio of 3:1, meaning your outer circle should about be three times the size as you inner one. The larger the inner circle, the fluffier the pompom will be, but it'll also take way more time to complete it. Repeat with a second piece of cardboard.


Put the two pieces together and just start wrapping yarn around it. At first it makes sense to use to strings of yarn at once. Then use a new piece (or two), until you can't see the center opening anymore.


Big brother tried. He really did. He kept at it for quite some time, too. I got more frustrated with the whole process than he did. Man, do I need to lighten up.


Eventually it'll look like this. You still need to keep going. Actually, this is a nice activity for in front of the TV. When the kids are in bed.


When you're all done (use a pencil or chopstick to help you push through the last bits), use your scissors to cut the yarn in between the cardboard discs. Then (and this is important), tie a piece of yarn around the pompom, in between the cardboard discs, pulling it all together and tying it really well.


Pull the cardboard off (some say to cut it but I didn't need to) and you've got yourself a nice pompom. At our house, that had to be a yellow one.


I helped big brother with the last pieces and then finished his off, too. And even though his looked quite funny when he was wrapping it, it turned out perfectly fine. If there are any pieces sticking out, you can just give it a little haircut.


The boys kept their for running around the house with, so I have to do some more for lion tail tips. Oh well. I put the discs and yarn next to the TV.

As for next week, I promise I'll pick something toddler friendly so little brother can get his hands dirty, too.

Any suggestions on how to better judge skill levels required for crafts? Please do share in the comments.

Happy crafting,
Swenja