Sunday, April 29, 2012

{the simple things} cats & boxes

What is it about cats and boxes?

Is it just my cats who jump or crawl into any size of box within a nanosecond of me putting it down anywhere in the house, even if they've been sound asleep on the other side of the house?

It doesn't matter if it's a tiny box or a huge one. They sleep in it. They fight with it (these boxes can be dangerous, I'm telling you). The fight about it. And finally, they get bored with it and go hunt for a new box. So if you ever come visit me, don't be surprised if there are empty boxes sitting in corners. Or anywhere else for that matter.

Every once in a while we get a really big box. You know, one that the cats actually fit in. The downside is, they have to fight with the brothers over it. Can't have it all I guess.


Then we have smaller boxes. Means they can rest their head on the side.


Sometimes they prefer some privacy when enjoying their box. So stop taking pictures already!


Then there are the tiny boxes. Or huge cats, whichever way you want to see it. Point is, it doesn't fit. Not even close.


Linking up with the simple things Sunday.


Can't wait to see everyone else's entries this week! I've been linking my posts every week this year, and it's been so much fun.

Happy Sunday!
Swenja

Friday, April 27, 2012

{kid craft} Kate's paper cup poppers

Would you say it's cheating if a craft takes you literally two minutes and can be done while cooking dinner? All with stuff you're likely to have around? It feels a bit like cheating. After all, the whole purpose of my kid craft series was to sit down with the brothers every week and have them practice all the nice, non-destructive things you can do with paper, scissors and glue.

You could of course argue that the whole purpose is for the kids to have fun and enjoy making things instead of just buying things (or getting bored). In this case we've found a new favorite.

I have to thank Kate of MiniEco for these. In case you haven't seen her newly released book, go check it out . Seriously, go have a look. I'll wait until you're back.

See? Told you it was great. What I love most is that it's got lots of craft ideas for boys. I thought it was funny how many crafts were photographed with girls, because really, this is finally a craft book that's not pink or frilly or requires precise coloring in the lines. But if you know Kate's blog, you wouldn't have expected anything pink or frilly. In fact, this is so great that I got to flip through it exactly once before the brothers ripped it out of my hands, announcing the things they wanted to do and taking the book with them to preschool the next day. It's been there ever since. 


Big brother's preschool teacher was equally impressed and has already done a few of the crafts with the kids, so I have a hard time catching up. When he came home with one of these paper cup poppers cups, little brother wanted do have one, too. Which is why I had to do this right now mommy, while making dinner. Luckily I had a paper cup in my kitchen left over from Easter, ballons are always in the kids' stuff and a yellow (of course) felt pompom wasn't hard to come by either. 


Oh, and a daddy home early who happened to be nice enough to do the actual crafting, as in cutting the bottom off the cup, pulling the balloon over the opening and securing it with clear packing tape (as opposed to the rubber band Kate suggests). Done. 


The brothers went off, happily shooting felt pompoms all over the living room, crawling under the couch and scrambling to catch the pompoms before the cats got hold of them.

I have a feeling I should plan some more time for next week's craft.

Happy crafting,
Swenja

Sunday, April 22, 2012

{the simple things} flowers for mommy

The brothers went on a walk with their grandmother last week and came back with these flowers they picked for mommy. Awwwwwww. They've only lasted a couple of days since I kept them inside on a sunny windowsill, so I quickly took a picture to remember them (or two or three...).


Linking with Rebecca's simple things today.


Happy Sunday!
Swenja


Friday, April 20, 2012

{kid craft} play cat food

As a regular reader of this blog you might have noticed that cats are a big thing at my house. We have three of them. And the brothers have quite a few more of the stuffed version. Those are really nice to have around actually: they don't follow you around the house meowing; they don't want to be let out only to stand in the open door, stick their little furry nose outside and slooooowly sit down because they can't decide whether they want in or out; while they do sleep in the bed, they don't claim your pillow; they don't have a litter box to clean and they don't need to be fed. Well, until now.

"Mom, my cat needs to eat something, too!" demands big brother and gets a bowl from the kids stuff drawer in the kitchen. "Mine, too!" seconds little brother, as little brothers like to do. Of course he also goes and grabs a bowl. 


They share the wooden cat food that came with big brother's play store. "Share" means that big brother's cat gets a bowl full while little brother's cat gets three little pieces. Apparently, little brother's cat was not thrilled with this outcome, and neither was little brother. "But I did share my cat food" big brother defends himself. He has a point. So before the rest of the lunch is overtaken about discussions about hungry toy cats, I suggest we make some more cat food.


Before I had kids I never imagines I would say sentences like that. Or even think about play cat food, let alone how to make it. Oh well. 

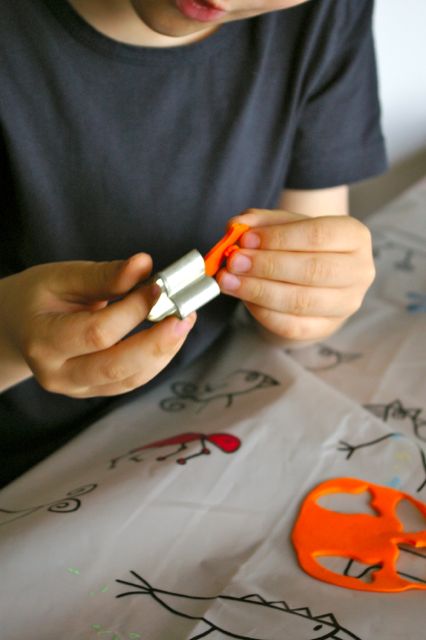
Since I wasn't going to break out the saw and make those tiny wooden fish and little squares that came with big brother's cat food, we got out some polymer clay from the German brand Fimo. I bought this a while ago due to some fond memories of my mom and me making all sorts of stuff from it. I was a little bit shocked when I unpacked it and saw all those huge warning signs stuck all over it, saying that basically kids under 8 shouldn't be using this anyway and even older kids required adult supervision. Oh, ok.


We went ahead anyway, making sure to take off the good shirts, cover the table and keep everyone's hands out of their mouths. Since this stuff is like fairly hard play dough, I took over the rolling out part and had the brothers choose colors, cut pieces with a table knife and cut out tiny fish with a tiny fish cookie cutter. 


Yep, we have tiny little fish shaped cookie cutters. When big brother was little and just started preschool, cutting his sandwich into tiny little fish was the best way to get him to actually have breakfast in preschool, and also the cleanest, as these fish are so small they can be put into little mouths in one bite, so you can sandwich messy things like cream cheese inbetween without getting it all over them. We used to call them breadfish. 


Anyhow. The brothers chose turquoise and yellow (no surprises here) and we added brown and orange as in the wooden cat food. We cut out shapes and put them on a sheet of aluminum foil for baking them in the oven. Once fully cooled, the shapes harden and can be fed to our large litter of terribly hungry toy cats. Yum.


Now, I wouldn't do this with really small kids around or worse yet, crawling babies ot toddlers who still put everything in their mouths except for broccoli, but frankly, with all the tiny Playmobil and Lego pieces around the house, a few Fimo cat food pieces don't really make much of a difference anymore.

Well, most of the yellow and all of the turquoise and brown are gone, but any suggestions on what to make with the remaining colors of green, red, white and blue?

Happy crafting,
Swenja

Thursday, April 19, 2012

Swedish window shopping. Or is it phone shopping?

I took a little trip to Ikea last week. Nothing exciting, just getting some chairs for the porch and matching pillows. Black ones. Yeah, I know so cheerful, isn't it? But you see, we have a white house, and besides - I have two boys. And three cats. So black is good.

Anyhow. Apart from the oh so exciting black outdoor cushions, I did see a few cute things. And since this is a really, really busy week with an even busier weekend, I'm just going to show you some bad pics taken with my phone camera and call this a post today... (hey, at least it's got nothing to do with sewing!).

Unlike the black, this insulated bag here is quite bright. Maybe a little too bright for me, but it does look like summer.


This is baby bedding. So cute. Doubt that my boys would go crazy over it though.


Dito for this one. Or maybe I could get away with it, since it has all sorts of paw prints on it. Love it!


Don't you just love those birds?


These little guys I actually got, a set of three tins. I have the previous model and was quite bummed the last time I was there to get more of them and they were sold out. I have to say I like the new ones even better.


I also liked these ones. There are enough cushions on my sofa though. Sigh.


I didn't realize they had started selling that bucket in other colors than cream. Love it.


That planter would look so cool with the black cushions on my porch... But almost 40 EUR for one? I don't think so.


What are your favorite products currently?

Cheers,
Swenja


Wednesday, April 18, 2012

Just one more sewing project. Really. Or: how a slipcover became a bag

Is it ok if I show you one more sewing project? Please? Because I’ve already shown it to anyone who didn’t run away quickly enough seemed remotely interested. If you can’t stand anymore sewing projects, come back another day. Like for simple things Sundays, those have been sewing-free. So far.

Just in case five oilcloth baskets and a handful of kids’ hats and scarves weren’t enough, this is one more to prove that I really, really caught the sewing bug. I made this the week before Easter. Not because it was planned or on my to do list. Nope, I had no plans for this at all (gasp! Me! No plan!). I had been meaning to try making a small bag for taking my phone, keys and some tissues with me when I go for a walk with the kids. Usually, I just stuff everything into my coat pockets. While that doesn’t look very pretty during winter, it starts to get really ridiculous once the weather gets warmer.


When I came across this free tutorial I knew I had to make it. As with the Easter baskets, I should have been doing something useful like cleaning windows, weeding the flower beds or at least go and finally purge and clean out that under-the-sink cabinet in my bathroom. All of which actually was on my to do list.


Instead I went looking around my house for some heavier weight fabric. This not being planned, I had no interfacing around, and even if I did, I have no clue how to use it (yeah, I hear it involves ironing it, but that’s about all). Grabbing a bag of extra chair covers to take upstairs with me (never leave a room empty-handed, right?), I looked at one of the slipcovers. It looks like the one on this chair, found ages ago in a certain Swedish store’s As-Is section, except that my cats mistook it for a scratching post. Which it quickly turned into. Now, if my home would really be as organized and decluttered as I’d like it to be, this thing would have long been thrown out. Instead, it turned into my new bag.


The lining is made from one of my all-time favorite fabrics, Proteas by Cloud 9. Now, promise you won’t laugh, but the strap is actually made from two of these fabric things that come with the curtains in order to hold the panels together. I don’t like that look, so my curtains fall straight down and these things (do they have a real name btw?) were sitting in another, not-yet-decluttered pile of no-idea-what-to-do-with-this.

The whole project would have been a lot easier if I had just taken regular fabric, cut out the pattern pieces and sewn them together as per tutorial. But we know by now I’m not good at following directions, right? So in addition to pimping the outside with some mini pompoms I had left over from a failed attempt to make a pompom scarf, I also made an inside pocket and attached a little keychain. Well, actually I made something that sort of serves as an inside pocket, as usually totally eyeballing it and making up my own rules. I do realize this means the finished bag can’t be worn inside out anymore, but I can live with that. Because I do manage to lose my keys in this tiny bag if they’re not attached to anything.

Anyhow. Since I decided to make things complicated take the way more scenic route, it took me an entire morning to get this done. Just as I was having a quick lunch before picking up little brother, I realized something was missing on the outside of the bag. I had twenty minutes left before I needed to leave. Plenty of time to do some quick research on fabric flowers and make something that’s apparently called a fabric yo-yo. I had never heard of it before and this tutorial made me laugh so hard I almost choked on my lunch, but it worked like a charm. One circle of leftover lining, some thread pulled from the sewing machine, a vintage button from my totally professional collection that lives in three empty joghurt jars and no 15 minutes later the bag looked much better.


Did you ever try these yo-yo things? They’re addictive. I’ve since made another one for my regular bag plus one attached to a brooch so I can wear it to work. And I can see these on yarn wreaths, as headbands, on cushions… Someone stop me, please. They are just so easy and since you sew them by hand, you can easily to them in front of the TV. You know, when you’re not busy posting yet another sewing project athough you can almost see your readers roll their eyes.


Actually, I made a f already, for a friend's birthday this Saturday. I'd show you pictures but you'll just have to forgive me here - I'm too tired to even get off the couch to grab the camera and download the photos...


I think I'll better get some sleep now. Goodnight!

Swenja


Saturday, April 14, 2012

{the simple things} Sunday walk

What do boys do when the see a big pile of dirt? Right, climb all the way to the top and throw down rocks and pieces of dirt.


Blue skies! You have to love blue skies on a Sunday morning.


We even found some blossoms on the way. Well, at least I did. The boys were too busy throwing dirt and riding bikes. Oh well.


Wishing you a sunny Sunday!


Swenja


Friday, April 13, 2012

{kid craft} fingerprint painting

I'm a little behind on my kid crafts, at least when it comes to editing pictures and posting some sort of comprehensible text to go with them. So I thought I'd try posting something in the morning instead of at night when my brain is already half asleep. After spending about half an hour on a certain social network, I remembered why I don't usually do this in the morning anymore. Oh, that and I usually work.


Anyhow. Big brother's best friend turned six just before Easter. (Six! I still can't get over the fact that these little guys turn 6 this year and will go to school!) We of course had to make a birthday card. Since his friend is planning on a police themed party and we're getting him this really neat kit for identifying finger prints, I figured a fingerprinted card would be a good match.

The idea, like a lot of cool others, comes from Steph at Modern Parents Messy Kids. Within a nanosecond of reading the post I had ordered a copy of the book she mentioned: Ed Emberley's Complete FunPrint Drawing Book. You know how kids manage to get muddy fingerprints all over your house? Well, this book lets them actually use that talent on paper and turn it into artwork by showing them what lines to add to their fingerprints to make them look like anything from an angry pig to a police helicopter.


We pulled out the watercolors for this project. Ink pads work, too, but I figures watercolors would make for an easier cleanup. For us, painting the color on the fingertip with a brush worked better than dipping your finger in the paint directly, which lead to a smudgier print.


Then it's just a matter of making the prints, depending on the design you want. This is going to be a police car, in case you didn't notice.


The watercolor dries pretty quickly, so no need to wipe that paint of your fingers before grabbing a pencil and adding the remaining elements to your car.


Quick check with the book. Looking good.


Look, a helicopter! With an apparently brand-new, never seen before rotor system, but hey, you can tell it's supposed to be a helicopter. My kids not being quite the artists (neither are their parents and the genes unfortunately didn't make it to them from their grandfather), this is already an accomplishment. It's drawing with instant gratification. I like that.


More police cars on the way.


After the cars and helicopters were done, the book was quickly checked for what matters most to my boys, you know, right after things that go: cats and fish. Both are covered. So big brother did the cats. In case you are wondering, the second one from the left is not a bunny. It's a cat with double ears. Of course.


I love all the different instructions, but I like the critters best.


How can you not love an angry pig?!


Happy painting,
Swenja